Deal of the Week #3

Need embellishments? Check out this weeks Deals! The third deal of the week is from October 19, 10 AM (MT) through October 26, 9:50 AM (MT) Have questions please let me know. Click on the Deal of the week button on the right hand side.Thanks for stopping by! 

Item 

Page 

Description 

Regular Price 

Special Price

114348 

179 

Basic Jumbo grommets 

$6.95

$4.49

109857 

179 

Mini Library clips 

$12.95 

$8.99

112571 

179 

Circle Designer brads 

$5.95 

$3.99

112581 

179 

1/2" Library clips 

$6.95 

$3.99

Happy Stampin',

Yvonne Metz
Vista, Ca.

Sunday Share

DSC02969 Well here is another project that I worked on this weekend.

I've been wanting to make some of these as I've seen them while I was Blog  Hopping then I came across Dianna Gibb's Blog (Check it out she's got an awesome video tutorial) and saw it again and was totally inspired to sit myself down and make one or two.

How fun and easy and I've got to say very addicting. You can make them for any Holiday, Birthday party favors etc…

DSC02970Recipe is as follows:

Stamp Set: Hoiday Bes (Hostess Set)
Ink: Basic Black & Pumpkin Pie
Cardstock: Basic Black, Whisper White, Pumpkin Pie and Cast a Spell DSP

Accessories: Sizzix Box #2, Old Olive Striped Grograin Ribbon 1 1/4, Dazzling Diamond Glitter, Dimensionals.

Questions please let me know. Thanks for stopping by and Happy Stampin',

Yvonne Metz
Vista, Ca.

Here’s our new Addition…

Ok…so yesterday I posted about our new addition and left you all hanging. ; ) So she was born on 8/2/09!  Her name is Jada and as of yesterday she weighs in at 14 lbs! She is to darned CUTE if I say so myself. See for yourself.
DSC02948 DSC02949 DSC02950 
Ok, now I have a feeling you were thinking something else huh! No way Jose! LOL!! But here she is we got her on Wednesday. Now can you tell in this last photo that she has made her self very comfy here second day? ; ) She is part German Shepherd and ?? (Fence Jumper)  She needs a shirt that says whose MY Daddy? ; )  Anyway, we got her Coastal German Shepherd Rescue what a great group this is! I got to see Mommy and some of her Sisters when we picked her up! Anyway just thought I'd share and will have more goodies for you! Thanks for stopping by and Have a wonderful Saturday!

Yvonne Metz
Vista, Ca.

Happy Friday!!!

I am back….sorry to have been MIA once again. I had some issues with my Account which are resolved now so I'm back to blogging.  Now to update everything ;  ) in time it will be for sure. Oh and we have an addition to the family…I'll share that later. I know how mean to just keep you wondering huh? ; ) 
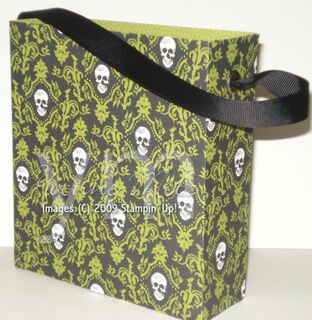
DSC02930 But now I'd like to start with what I had ended with.  I have a step by step tutorial for the Halloween Bag PLUS 3 different measurements so Enjoy and I'll have my video done over the weekend.

Ok, here is the newest Halloween Bag I've made…LOVE making these bags so simple and just a score here and a  cut there and you've got a super cute bag or if you make the smaller one you can close it up. Photos will show that below.  So let's start with the measurements!

Large bag which is the one I made on the post below are as follows:
10 1/2 x 11/12 – 2 pces – Score 3 sides at 2 1/4  -  Handle: If you use paper you can cut a strip of 1 x 11 1/2 (1 or 2 depends on what you like)

Medium Bag measurements are as follows:
8 1/2 x 10 – 2 pces  – Score 3 sides at 2 inches -  Handle: for the photo I used Black Grograin Ribbon with Jumbo eyelets.

Small Bag Measurements are as follows and Tutorial for these measurements below:
6 x 6 – 2 pces LOVE this size since you can get the Sampler Pack as a Hostess gift and it comes with 2 sheets. Woo Hoo! Ok, now this one I Scored 3 sides at 1 inch  -  Handle/your choice
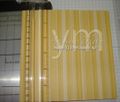
Photo 1Click on images to see larger photo.

Step 1: 

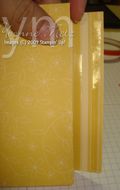
Score both pieces.  For this 6 x 6 you'll score 3 sides at 1 inch.
fold/crease all 3 sides


    Photo 2 Photo 3   
Steps 2 & 3:Snip as shown on 1 Piece take off the Tabs completely.

Photo 4  

Step 4: Add your adhesive as shown. I LOVE  my sticky strip.

Photo 5

Photo 6 Photo 7  

Steps 5, 6, 7: Put together as shown
Tip – on step 7 which is putting the sides together make sure they line up. You may need to trim top just a tad. 
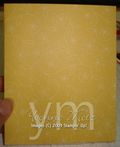
Photo 8 Photo 9 Done plus on the smaller bag you can squeeze the top as shown and close the way you like. Will show finished project of this a little later. Now just decorate as desired!

I sure hope you enjoyed and if you have any questions please let me know.  Will be working hard this weekend to get my blog updated.  More projects too!

Thanks for stopping by and have a wonderful weekend!

Yvonne Metz
Vista, Ca. 

Build a Bear Halloween Bag

Halloween Bag

Hello all! First I have to say what a computer nightmare I had! I LOST..but..recovered my Photos. UGH! We wont' talk about the video I was ready to upload..we just won't go there. So it's back to the drawing board for that. But it could of been worse. The thing is I usually back up all my files but forgot!  Have had other personal stuff going on. ; (

Anyway I wanted to share this super CUTE and lt me say EASY Halloween bag that I made.  I used my retired Stampin' Up! DSP as I've got TONS of it! LOL! Ok, I know I'm not alone out there!  I'll have measurements for you when I share the other bag that'll I been finishing today..just a tad bit smaller. If you have questions pleast let me know.

Happy Stampin,

Yvonne Metz
Vista, CA.

Halloween Project

Coffin

Wow this week just flew by!  I can't believe it's Friday and it's almost October!  Is it just me or did September seem to go by fast??

Ok, I have been working on Halloween stuff! I LOVE these Holidays coming up!  This pattern I did get from the Stampin' Up! Demo Webiste! I seem to always forget about all the patterns that are there. ; ) Below is what I used.

Stamp set: Eat, Drink & Be Scary
Cardstock: Black, Whisper White, Old Olive
Ink: Basic Black, White Craft Ink
Accessories: Small/Large Tag Punch, Gingham Ribbon

There is more to come! I'll post some over the weekend!  PLUS I'm almost done with another Video. Thanks for stopping by and if you have any questions please let me know.

Happy Stampin,

Yvonne Metz
Vista, Ca.

Friend to Friend Scallop Card

Scallop CardHello all!  Sure hope you are having a very nice weekend!  My Hubby and I are enjoyed a quick get away on his Birthday weekend.  Today is his actual Birthday.

Well I wanted to share this card. This is the one I did the Tutorial on. I've had a few questions about the measurements for this card so I thought I would share them here for all.

Card Measurements:
Standard – 5 1/2 x 4 1/4 Melon Mambo
DSP – 5 1/4 x 4 plus 1 strip 4 x 1/2" (Razzleberry Lemonade)
3 3/4 x 3 – Melon Mambo
2 3/4 x 2 3/4 – Crushed Curry
2 1/2 x 2 – Whisper White
Questions? Please let me know. Have a great rest of your weekend! Thanks for stopping by and Happy Stampin',

Yvonne Metz
Vista, Ca.


Build a Bear Birthday Cards

BABG Card
Geez this week just flew by!  I am still editing and fixing the video it should be done next week for sure. I know I'll get better at it. Ok now to share.

Here is a Super easy card! I really LOVE this set! Not to mention the Dies oh and the Designer Series Paper too!!! Wait til you see the Halloween Bag! UGH!! There is just so much you can do with all this.

Recipe:

Stamp Set: 118052 Beary Best Friends, 118050 Beary Nice Wishes
Cardstock: Certainly Celery, Pretty in Pink & DSP Pawsitively Prints, Water Color Paper
Ink: C. Celery, So Saffron, Choc. Chip
Accessories: Glitter, SU Dimensionals, Blender Pens

BABB Card

Here is the  Bearthday Bear Boy Card. Same supplies as above. Cardstock/Ink used was Ballet Blue & Pumpkin Pie.

Such a great set to work with. Thanks for stopping by! Any questions please feel free to email or call me!

Hope you all have a wonderful weekend & Happy Stampin',

Yvonne Metz
Vista, Ca.

Bears, Bears and more Bears

BABG
Happy Tuesday!  Well I've been struggling with my Allergies this past week, which I haven't had to worry about for awhile so it caught me off guard…but I have managed to get SOME "Stampin'" in! 

Yes, I've been playing with the new Sizzix Build a Bear Dies…talk about addicting! OH MY!  Plus I've got cards, 3D projects and another Video to share this week. So make sure you come on back and check it out!

Is she not the cutest? I used the Razzleberry Lemonade DSP for her clothes! I left off her purse! I know what was I thinking! ; )

 BABB   

The ones that are together all I did to get them to look like ther are holding hands was to turn the Bear the other way..Or backwards? Does that make sense?

 Anyway I thought they would look super cute holding maybe Balloons or something. HMMM…see the ideas just keep coming!  I'll share some cards tomorrow!

BABGB


Thanks for stopping by & Happy Stampin,

Yvonne Metz
Vista, Ca.


Scallop Flower Tutorial

Happy Tuesday! Hope you all had a wonderful Holiday weekend!  Well I was busy that's for sure. Didn't get as much stampin as' I would of liked done. BUT I did manage to get a Video Tutorial done!  Woo Hoo! I'm working on a few more. So below you'll find the tutorial for The "Scallop Flower".  This is a great little flower and super easy and addicting. Makes a perfect focal point on a Card, 3D Project even Scrapbook Pages.  See this Post for a sample. So enjoy and as always if you have any questions please let me know. 

Thanks for stopping by!

Yvonne Metz
Vista, Ca.

If you can see it  below you can CLICK HERE!!

error: Content is protected !!
0

Your Cart